¶ Linked Users
Linking a badge allows the requestor to be able to control the linked badge as if it was their own. This makes it much easier for someone to manage events for multiple badges.
Badges bought in the store (not through registration) and those comped through an item purchase will appear in the Linked Users section as Unassigned Badges. These should be renamed to represent the badge holder, but may also be assigned to another account or linked to the primary account for full management control of the badge.
Notes:
- A badge may manage or link to multiple badges, but may only be managed by one badge. Once a badge is managed via linking another badge cannot request a link to it.
- The managing badge has no access to the account menu or payment methods of the managed badge.
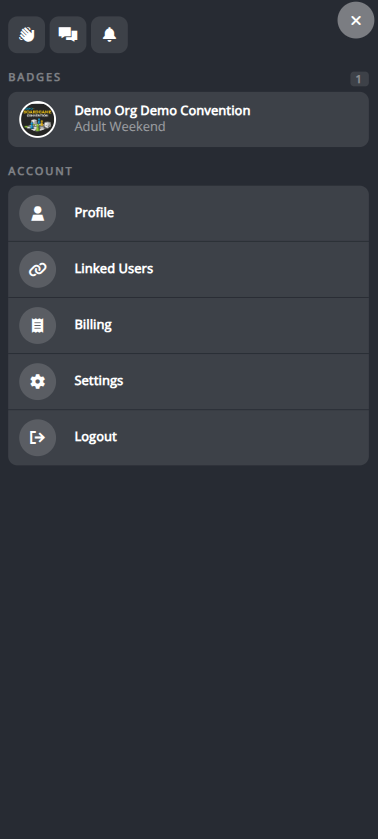
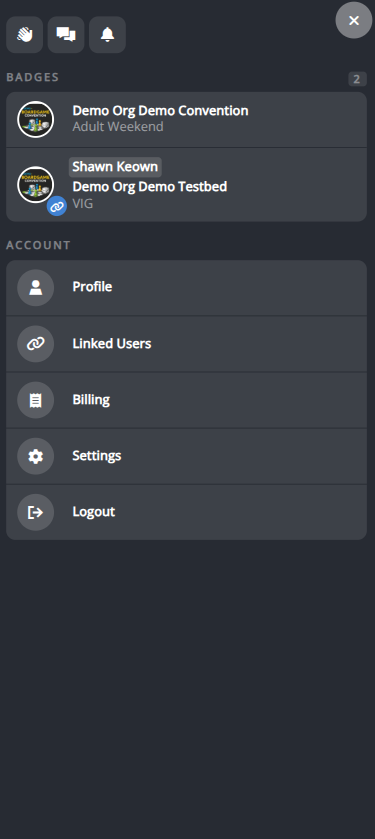
¶ Accessing Linked Users
-
Login to the Android, iOS, or web app at cardboardconnect.com.
- Look for the button in the top right.
-
Select from the context menu (where you clicked Login)
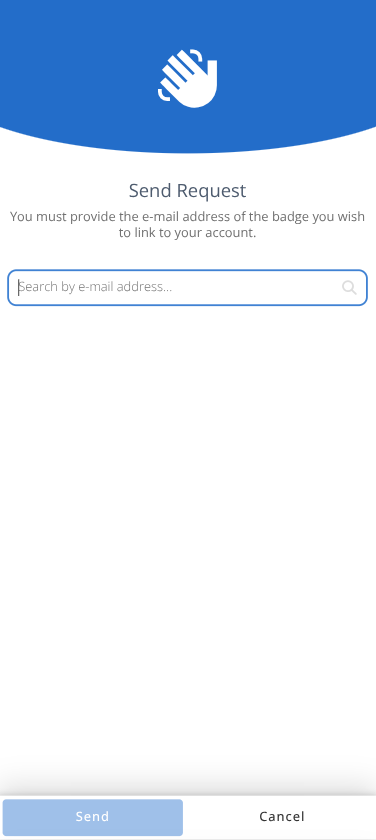
¶ Send a Link Request to Link a Badge
From the Linked Users section:
- Click .
- Enter the e-mail address of the badge you wish to link to your account. (i.e. manage)
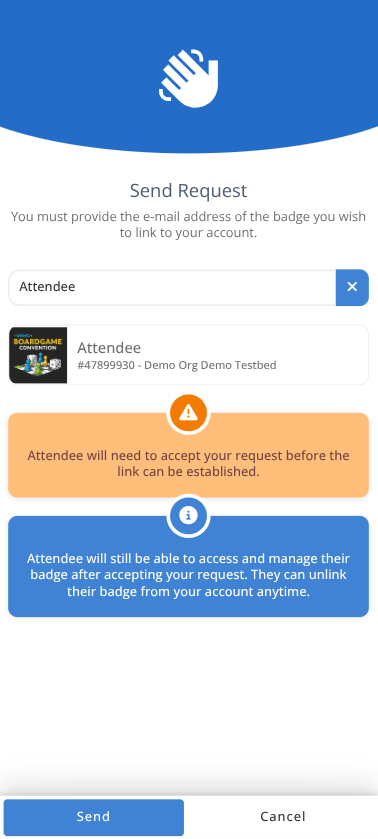
- From the pop up selector choose the badge you wish to link.
If no options are shown there is no valid badge for you to send a request to. - Review the details of the link request and when ready click .
- To review all incoming and outgoing requests select the Requests tab.
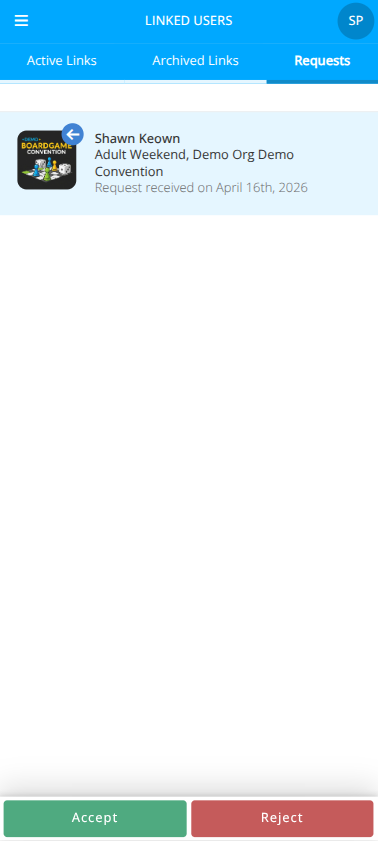
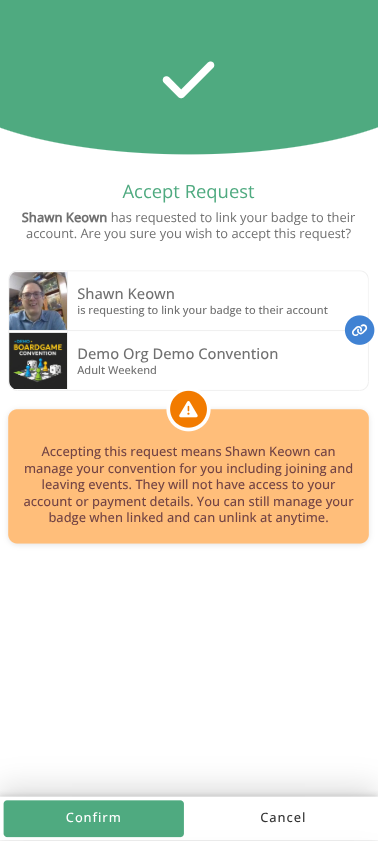
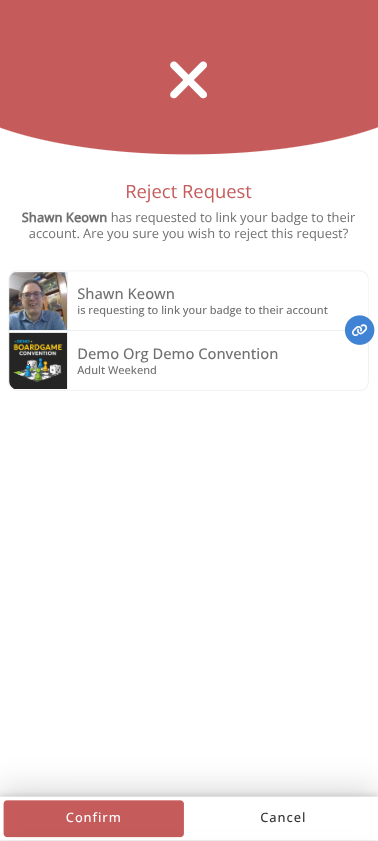
¶ Accept a Link Request
From the Linked Users section:
- To review all incoming and outgoing requests select the Requests tab.
- Select to accept the request or to reject the request.
- Review the details of the response and click either or .
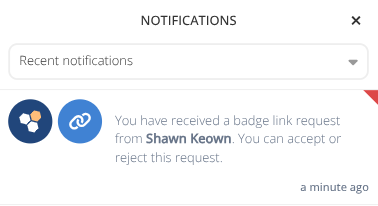
The requestor will receive a notification regarding the approval or rejection of the request.
¶ Link an Unassigned Badge
From the Linked Users section:
- To review all Unassigned Badges select the Active Links tab.
- Select the Unassigned badge you wish to link (i.e. manage)
- Click the button.
- The badge will now show in the Active Links with the linked symbol.
- To access the badge click on the Context menu and select the badge from the list of badges.
- You can toggle freely between badges. This can be especially helpful when trying to have multiple badges take seats at the same event.
![]()
![]()
![]()
¶ Rename an Unassigned Badge
From the Linked Users section:
- To review all Unassigned Badges select the Active Links tab.
- Select the Unassigned badge you wish to link (i.e. manage)
- Click the button.
- Enter the new First and Last Name and click .
- The badge will be renamed and can be viewed from the badge home page.
![]()
![]()
¶ Assign an Unassigned Badge
From the Linked Users section:
- To review all Unassigned Badges select the Active Links tab.
- Select the Unassigned badge you wish to link (i.e. manage)
- Click the button.
- Enter the e-mail address of the new owner and select the matching account from the pop up. If the e-mail address does not have an account you will be given the option to Invite as new user
- Confirm the name shown is as expected, or enter the name of the recipient in the case of an invitation, and click .
- The badge will be assigned to the new owner and you will no longer have access to it. The new owner will need to manage the badge from their own account.
Caution: Once a badge has been assigned all access to it will be lost by the current badge holder.
![]()
![]()
![]()
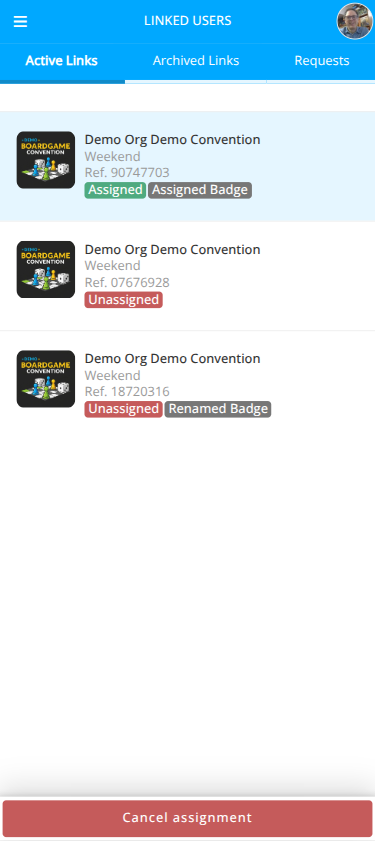
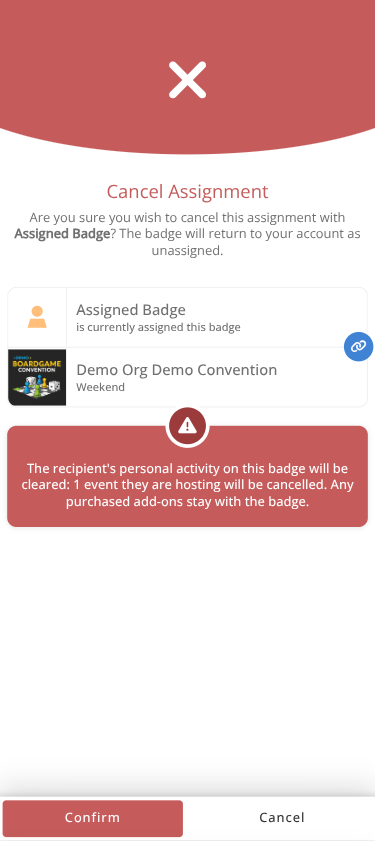
¶ Cancel an Assigned Badge
A badge that has been assigned out can, in some situations, have that assignment cancelled and control of the badge returned to the purchaser.
From the Linked Users section:
- Select the Active Links tab.
- Select the Assigned badge you wish to link (i.e. manage)
- Click the button.
- A confirmation dialog will be shown that indicates if any personal activity is on the badge and that events will be cancelled if the assignment is revoked.
- Confirm the details are correct and expected and click .
- The badge will be returned to you, it will be automatically renamed to be your name and should be renamed and assigned out again as needed.